Showing posts with label fabulous foil designer acetate. Show all posts

Tuesday, April 4, 2017

Big Top Celebrations


I was recently at a stamping and scrapbooking retreat and I always like to share a little something with the people that attend.  This time the theme was "Life's a Circus" and thought it would be fun to make some cards using the Carousel Birthday stamp set and the Cupcakes and Carousels designer series paper.  There were several versions of the card, this happens to be one of them. 


For this card, I also added some Fabulous Foil designer acetate and my tent is stamped on a die cut using the Stitched Shapes framelits.


Supplies:
Carousel Birthday
Bermuda Bay ink
Very Vanilla card stock
Stitched shapes framelits
Fabulous Foil designer series acetate
Cupcakes and Carousels dsp


post signature

Tuesday, February 14, 2017

Valentine


Another day with two cards instead of one today!  Valentine's Day is also my anniversary (19 years!) so I have an anniversary card and a Valentine's Day card using the same stamp set to share with you today.


The first card starts with a die cut using the Stitched Shapes framelits and the 2" circle punch.  I added some Fabulous Foil designer acetate as my window and put in some sequins and Sending love embellishments.


Then I added some stamping and a tiny envelope and note card with a little bow on top.


The Valentine's Day card was one in my stamp a stack last weekend using the Seals with Love stamp set and Fruit Stand designer series paper.  You will see some of the same elements in this card as the one above.


Supplies:
Sealed with Love
Watermelon Wonder, Mint Macaron ink
Whisper White, Mint Macaron, Watermelon Wonder, Crumb Cake card stock
3/8" metallic ribbon (SAB 2017)
Fruit Stand dsp
Stitched Shapes framelits
Love Notes framelits
sequins
Sending Love embellishments
2" circle punch
Fabulous Foil designer acetate


post signature

Tuesday, January 10, 2017

Detailed Things


I generally tend to stay away from fussy detailed dies on my projects but that is one thing I am trying to start to use more.  The Die Brush definitely makes it easier to get all those fussy little pieces out once you run the die and paper through the Big Shot. 


<a data-pin-do="buttonBookmark" data-pin-tall="true" data-pin-round="true" data-pin-save="false" href="https://www.pinterest.com/pin/create/button/"><img src="//assets.pinterest.com/images/pidgets/pinit_fg_en_round_red_32.png" /></a>

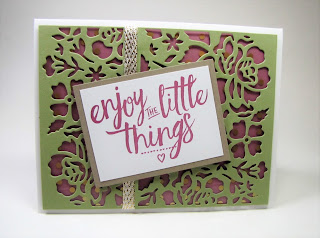
On this card I used the Detailed Floral thinlits on some Pear Pizzazz card stock and added some Fabulous Foil designer acetate between that layer and a piece of Sweet Sugarplum card stock. 


The acetate is difficult to see in the pictures and maybe was a step I didn't really need on this one.

Supplies:
Layering Love
Sweet Sugarplum ink
Sweet Sugarplum, Pear Pizzazz, Crumb Cake, Whisper White card stock
3/8" metallic ribbon (SAB 2017)
Detailed floral thinlits
Fabulous foil designer acetate


post signature

Thursday, October 13, 2016

In Everything

This card came about because I had some scraps lying around that I wanted to use.  The Fabulous foil designer acetate in the background is the only piece that I didn't actually re cut to make the card though...


A couple layers of matted Blooms and Bliss designer series paper wrapped in some gold bakers twine from the Baker's twine trio pack sits behind the sentiment from the Suite Seasons stamp set.


Supplies:
Suite Seasons
Sweet Sugarplum ink
Crumb Cake, Whisper White, Mint Macaron card stock
Blooms and Bliss dsp
baker's twine trio pack
Fabulous foil designer acetate


post signature

Thursday, September 22, 2016

Fabulous Foil Box


Once in awhile I make card boxes when I want to share some cards as a gift or thank you and I have shown you a few in the past.  This one is made with the Fabulous Foil designer acetate found in the Idea Book and Catalog.  I love the designs printed on the acetate sheets!

\

Because I wanted the design to stand out, the back of the box is made with Basic Black cards stock. 


To decorate, I used the Thankful Thoughts stamp set, circle punches, a delicate doily and some Candy Cane Lane baker's twine.


And finally the box with some cards in it ready to share with someone!

Supplies:
Thankful Thoughts
Cherry Cobbler ink
Whisper White, Basic Black, Cherry Cobbler card stock
Fabulous Foil designer acetate
delicate doilies
Candy Cane Lane baker's twine
1 3/4" and 2" circle punches
Tear and tape adhesive


Friday, September 16, 2016

Christmas Memory Tray


I always love playing with this type of decoration, trying to tie in different ideas in all the different slots of the memory tray.  In the last few weeks I have put together a couple different ones with different themes and while I will show them all to you eventually, I thought I would share the Christmas themed one first.


The wooden tray is 12" x 12" and while this one happens to be white, I also have some black ones to play with :)  I started by choosing one of the designer series paper packs that Stampin' Up! has available in a Christmas theme and the one I chose is called This Christmas specialty paper. 


Next, I picked the stamp sets - Wonder of Christmas and Star of Light...


I definitely had a good time playing with embellishments on this project, some retired and some current, but all of them are Stampin' Up! products.


Although Crumb Cake is not a color in the This Christmas specialty paper collection, I decided to add that to my color scheme.


For the ink colors, I stayed with the same ones as in the paper - Cherry Cobbler, Basic Black and Garden Green except for coloring in the angel where I added a few other colors.


My favorite pattern of the paper collection is the music sheets, I have always been drawn to that and decided to highlight it a couple of different ways - with some Fabulous Foil designer acetate over the top in one slot and as a large background in another.


If you happen to be able to go to the Fall Scrapbooking retreat at Park River Bible Camp in November, this is a project that I am teaching a class on and you will have a few different themes to choose from :) 

Supplies:
Wonder of Christmas, Star of Light
Cherry Cobbler, Basic Black, Garden Green, Soft Sky Crumb Cake ink
Garden Green, Cherry Cobbler, Crumb Cake, Very Vanilla card stock
This Christmas specialty paper
Fabulous Foil designer acetate
Starlight thinlits
Ovals collection framelits
lace trim
gold sequin trim
mini jingle bells
metallic enamel shapes
gold designer buttons


Thursday, September 8, 2016

Mini Treat Bag with a Window


When I went into my stamp room the other day to create, I had in my head I was going to put together a Halloween themed treat bag using the Mini Treat Bag thinlit dies and the Halloween Night specialty paper.  As I was doing my die cutting, I decided to add a little twist to the bag and add a window with some mini pumpkins and sequins floating around inside.


I punched out the circle with my 2" punch after I had die cut the bag pieces and then added a piece of Fabulous Foil designer acetate on the inside of the bag.  Next, I took the foam adhesive strips and went all the way around the circle and added the mini pumpkin die cuts and some sequins in the circle before placing another piece of Halloween Night specialty paper onto the adhesive strips.


To decorate the rest of the bag, I used some white thick baker's twine, Pop of Pink washi tape, Thoughtful Branches stamp set and Ghoulish Grunge stamp set. 


I also added a few Halloween night enamel dots to my sentiment.

Supplies:
Thoughtful Branches, Ghoulish Grunge
Basic Black, Smoky Slate ink
Halloween night specialty paper
Fabulous foil designer acetate
Smoky Slate, Peekaboo Peach card stock
Halloween night enamel dots
thick white baker's twine
Pop of pink washi tape
gold binder clips
sequins


post signature

Tuesday, August 2, 2016

July Paper Pumpkin Layout

I decided to use one of the little boxes from the July Paper Pumpkin kit on a scrapbook layout.  All I did was cut off the tabs and then added it to my page.  It is placed over a piece of Fabulous foil designer acetate and next to a piece of Serene Scenery designer series paper.


I added a couple different die cuts from the Sunshine Wishes thinlits collection, a In Color doily, washi tape and some rhinestone flowers (retired) to complete it.


For the journaling, I just wrote on the lines of the designer series paper.

Supplies:
Layering Love
July 2016 Paper Pumpkin kit
Fruit stand dsp
Serene scenery dsp
Sunshine Wishes thinlits
Playful Palette washi tape
in color doilies
Basic Black, Tip Top Taupe and Watermelon Wonder card stock


post signature

Monday, July 18, 2016

Birthday Window


Today is my sister's birthday and I wanted to do something a little different for her card.  I admit, sometimes I pull a birthday card out of the stash for family birthdays, but it usually depends on how busy life is at the moment.  This time I was able to take the time and make the card I wanted for her.

I decided to make a window using the ovals framelits and added some Fabulous Foil designer series paper behind it.  Then, I used some Stampin' dimensionals all the way around the oval and added some sequins from the June Paper Pumpkin kit inside.


Before I attached that piece to the card, I took a piece of Whisper White card stock and embossed it with the Brick Wall folder.  Then I stamped the flower image from the Butterfly Basics stamp set, colored it in and used a sponge to highlight the bricks.  Then I added it to the Peekaboo Peach window layer.


I did a little more distressing and added some basic pearls before the card was completed.


Supplies:
Butterfly Basics, Rose Wonder
Crumb Cake ink
Crumb Cake, Whisper White, Peekaboo Peach card stock
Brick wall folder
sponge
basic pearls
ovals framelits
Fabulous Foil designer series acetate


post signature

Tuesday, July 12, 2016

Flower in the Window


One day last week I was trying to decide how to use the Sunshine Wishes framelits on a card and I looked down and saw the Fabulous Foil Designer acetate package that I had not opened yet.  So, I picked out a pattern and die cut my scalloped square on a piece of Smoky Slate card stock using the Layering Squares framelits.


Then, I used the flower die cut from the Sunshine Wishes set and some Black card stock and decided I wanted to add some color in the petals.  I glued some Wisteria Wonder card stock onto the back of the flower with my fine tip glue pen and after it dried I cut around the petals.  I noticed that I had a little glue residue on the front side of the Basic Black card stock so decided to mask it with the Wink of Stella glitter brush all over the die cut.


I placed some Whisper White card stock that had been embossed with the Brick wall folder behind the acetate and flower and completed my card with some washi tape.

Supplies:
Sunshine Sayings
Basic Black ink
Basic Black, Smoky Slate, Whisper White, Wisteria Wonder card stock
Fabulous foil designer acetate
Layering Squares framelits
Sunshine Wishes framelits
Wink of Stella glitter brush
washi tape
Brick wall folder


post signature

Blog Archive

About Me

My photo
I am a mom, wife, farmer and Stampin' Up! demonstrator from North Dakota. I love to stamp and scrapbook and share ideas with others so I thought I would try out a blog. Hope you enjoy it!