Showing posts with label holly jolly greetings. Show all posts

Friday, November 4, 2016

Holly Jolly Greetings


Back to a Christmas card to share with you today!  This one uses some designer series paper scraps kind of randomly thrown onto a piece of card stock that was stamped with some Gold Metallic ink.


My snowflake is also gold metallic and I added a retired button with some baker's twine in the middle of it.  The words were stamped with Basic Black ink and cut out by hand before I popped them up with Stampin' Dimensionals.


Supplies:
Holly Jolly Greetings
Metallic Gold, Basic Black ink
Emerald Envy, Mint Macaron, Whisper White card stock
designer button
baker's twine
Warmth and Cheer dsp
Presents and Pinecones dsp


post signature

Monday, December 14, 2015

Noel

 
This card came about because I happen to have the wooden "noel" sitting on my scrap room table and thought I should use it someplace!  I added some snowflakes from the Holly Jolly Greetings stamp set...

 
and then some Watercolor Wonder washi tape, linen thread and Corrugated paper before adding the "noel".

 
Supplies:
Holly Jolly Greetings
Crumb Cake ink
Whisper White card stock
Corrugated paper
linen thread
Watercolor Wonder washi tape
2" circle punch
Seasonal Snapshot Project Life (2014 I think)
 
post signature

Thursday, November 12, 2015

Wishing you Peace


For this card, I chose to focus on the designer series paper from the Season of Cheer pack and worked the rest of the card around that.  The little snowflakes are stamped with Crumb Cake ink and I used Night of Navy for the sentiments. 


The layer that the sentiments are stamped on is cut using the Big Shot and the Tags and Labels framelits.
 
Supplies:
Holly Jolly Greetings
Season of Cheer dsp
Crumb Cake, Night of Navy ink
Whisper White, Night of Navy card stock
Tags and Labels framelits
 
post signature

Sunday, November 8, 2015

Wooden Trees

 
I was playing around with some wooden trees this past week decorating them with paint, stamps, paper, ribbon, embellishments, etc.  They are all a little different and decorated on both sides.  

 
I put them together in sets of threes for my craft show on Thursday and this one was the most popular, but they went over well. 

 
I used mod podge to adhere the designer and specialty papers to the wood and then added the embellishments with several different adhesives.

 
The ones that were stamped have Metallic ink, craft ink, Memento ink and regular ink on them, and they all seemed to work well.

 
The fine tip glue pen worked great for the little embellishments that didn't have adhesive on them already.

 
This is the back side of the set of trees above...

 
and a few different ones...

 
If I made these again, I might not paint them all, especially if I am stamping colors on them because the red ink doesn't really stand out too much on the flowers.

 
The lace trim around the outside of some of the trees was attached with small nails...

 
And a few more samples...

 
close up...

 
it is hard to see too easily, but there are basic pearls on some of the snowflakes below...

 
Supplies:
Reason for the Season, Holly Jolly Greetings
Metallic silver, Metallic gold, Craft White, Memento Black, Sahara Sand and Real Red ink
designer buttons
basic pearls
basic rhinestones
winter wonderland embellishments
gold sequin trim
trim lace ribbon
metal rimmed pearls
Winter wonderland dsp
retired dsp
corrugated paper
circle punches
tea lace paper doilies
 
post signature

Friday, November 6, 2015

November Stamp Club Projects

 
This month I went with a fall themed layout and Christmas themed cards and tags.  The layout uses the Into the Woods designer series paper and I also used some images from the For All Things stamp set.  

 
For the cards, we used the Reason for the Season and Warm Wishes stamp sets. 


The Sleigh Ride edgelits seemed to pair well with the Home for Christmas designer series paper so we added the images from Warm Wishes to that card.

 
And we once again used the Home for Christmas designer series paper for the second card...

 
The tags used several punches - ornate tag topper, scalloped tag topper, 1 3/4" circle, 2" circle, decorative label and tree...and we used the A Little Something and Holly Jolly Greetings stamp sets to complete them.
 
 
Remember, if these projects look like fun you are welcome to join our group any time!  If you are not local, one of the Virtual Clubs might work for you as well.


Friday, October 23, 2015

Peace on Earth

 
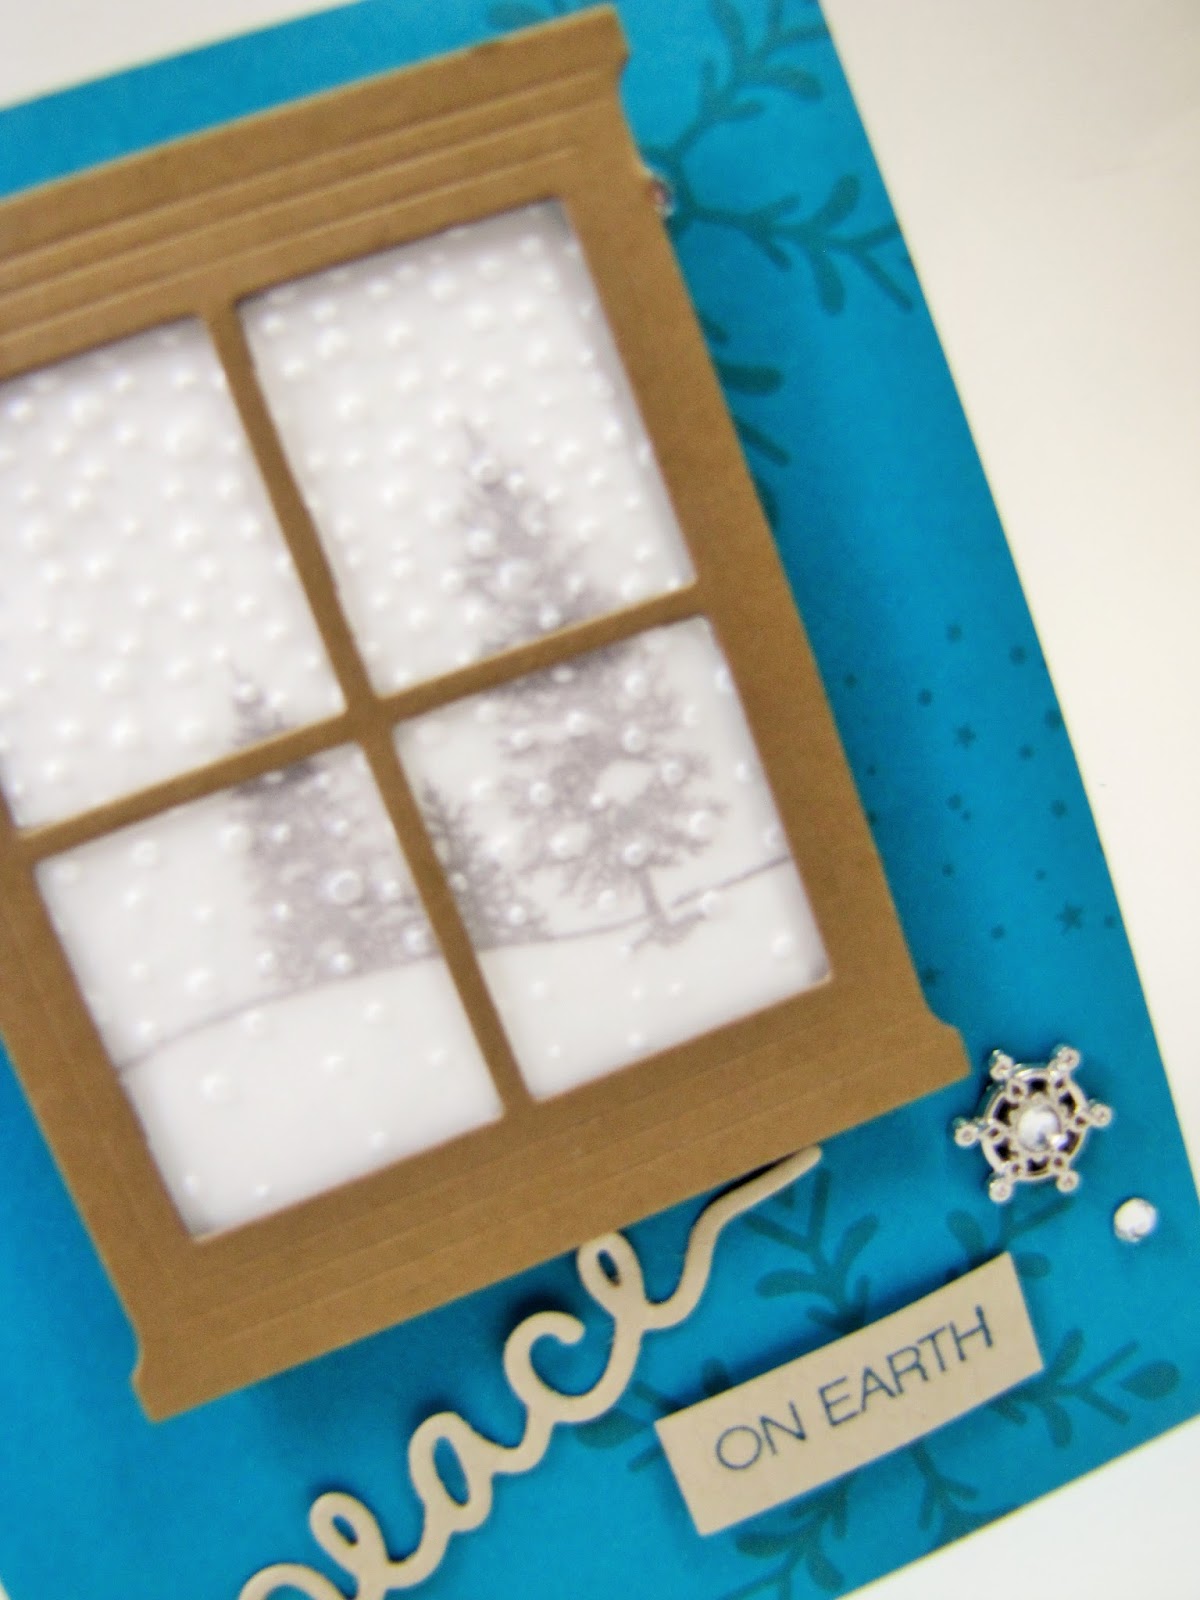
I just love the Hearth and Home thinlits paired with the Happy Scenes stamp set.  There are just so many possibilities!  For this card, I used a glassine sheet as a "window" and embossed it with the Softly Falling folder before I placed it behind the window frame thinlit.  Then I stamped the image of the evergreen trees on some Whisper White card stock and placed that behind the window. 
 
 
I chose the Holly Jolly Greetings set to add some snowflakes to the background and for the "on earth"...

 
"Peace" comes from another thinlit set called Christmas greetings and I used the fine tip glue pen to attach it to the card base. 

 
Finally I added some basic rhinestones and some Winter Wonderland Embellishments to finish it off.
 
Supplies:
Holly Jolly Greetings, Happy Scenes
Crumb Cake , Island Indigo ink
Crumb Cake, Whisper White, Soft Suede, Island Indigo card stock
Home and Hearth thinlits
Christmas greetings thinlits
glassine sheets
Softly falling folder
Winter wonderland embellishments
basic rhinestones
 
Last day for 15% off stamp sets! 
http://www.stampinup.com/ECWeb/default.aspx


post signature

Blog Archive

About Me

My photo
I am a mom, wife, farmer and Stampin' Up! demonstrator from North Dakota. I love to stamp and scrapbook and share ideas with others so I thought I would try out a blog. Hope you enjoy it!