Showing posts with label 3" circle die. Show all posts

Monday, March 26, 2012

Textured Tea Cups

Our Late Night Stampers Challenge this week is Texture - and if you have followed my blog at all you will know I LOVE texture from my impressions folders :)  so this won't be difficult at all!


For this card, I used the Vintage Wallpaper impressions folder on both the Baja Breeze strip that I cut with the Adorning accents edgelit and also the 3" circle.


As you will see on the last picture, the circle is cut through all the layers on the front of the card.  I attached them all and then ran it through the Big Shot; embossed the piece I cut out and attached it to the inside.  So the part of the circle you can't see that is attached to the inside of the card actually has 3 layers as well.  Using all the scraps :)


Supplies:
Tea Shoppe
Twitterpatted DSP
Riding Hood Red, Whisper White, Baja Breeze and Basic Gray card stock
Riding Hood Red classic ink
Riding Hood Red pleated ribbon
antique brads
Big shot
3" circle die
Adornding accents edgelit
Vintage Wallpaper impressions folder
1 1/4" circle punch
1 3/8" circle punch
word window punch
modern label punch
sticky strip
dimensionals


Saturday, March 17, 2012

Treat pouches

Angie Juda had these adorable pouches on her blog the other day and I had to make up a couple of them.  They have pockets on both sides for little candies or notes and are super easy to put together - you don't even need adhesive!  There is a tutorial on her blog if you would like to make a few.


I used the Beau Chateau designer paper for mine and you might remember the image on the left from a card I posted earlier this week.  As I usually do, I made a few of these images and kept them for other cards or project.


On the second one, I used the Upsy Daisy stamp set and stamped Pink Pirouette and Crumb Cake over the top of each other. 


Both pouches have some Victoria crochet trim ribbon at the top to hold the pouch together.

Saturday, March 10, 2012

Heartfelt thanks

Today's card uses the fun acrylic paint technique I have shared with you once before.  It is an idea
that we were given in our monthly Stampin' Success magazine that we receive as demonstrators
(this is an awesome perk!!). 


You just paint some card stock with acrylic paint and let it dry; then you run it through the Big Shot with an impressions folder and sand it lightly to highlight the texture. 

Supplies:
Fabulous Phrases, Bordering on Romance
Early Espresso, Very vanilla, Bashful Blue, Wisteria Wonder and Crumb Cake card stock
Early Espresso, Wisteria Wonder, Wild Wasabi, and Bashful Blue classic ink and markers
Adorning Accents impressions folder
Scallop Circles die #2
3" circle die
Big shot
Finial Press impressions folder
Victoria Crochet trim ribbon
basic pearls
champagne mist shimmer paint
dimensionals

Friday, January 13, 2012

Baby Prints

I just love the new stamp set Baby Prints from the Occasions Mini catalog. For this card, I added some Big Shot elements using the Stripes impressions folder, 3" circle die and Scallops #2 die. 


Supplies:
Baby Prints stamp set
Whisper White, Early Espresso, Marina Mist, Bashful Blue card stock
Marina Mist, Bashful Blue classic ink
Early Espresso bakers twine
Big Shot
Stripes impressions folder
3" circle die
Scallops #2 die
dimensionals


Sunday, October 2, 2011

Gratitude Medallions

I had some extra stamped medallions from the Day of Gratitude set left over from a project I did a while ago and decided to make them into cards.  They are paired with the Well Worn designer series paper and layered on some cork that was cut out with the 3" die in the Big Shot.


One version...


and the other version.


Supplies:
Day of Gratitude, Occasional Quotes
Well Worn DSP
River Rock, Not Quite Navy, Very Vanilla card stock
River Rock, Not Quite Navy, Cajun Craze and Early Espresso classic ink
modern label punch
3/4" circle punch
3" die
Big Shot
cork sheets
dimensionals
basic pearls
antique brads
denim ribbon

Thursday, September 22, 2011

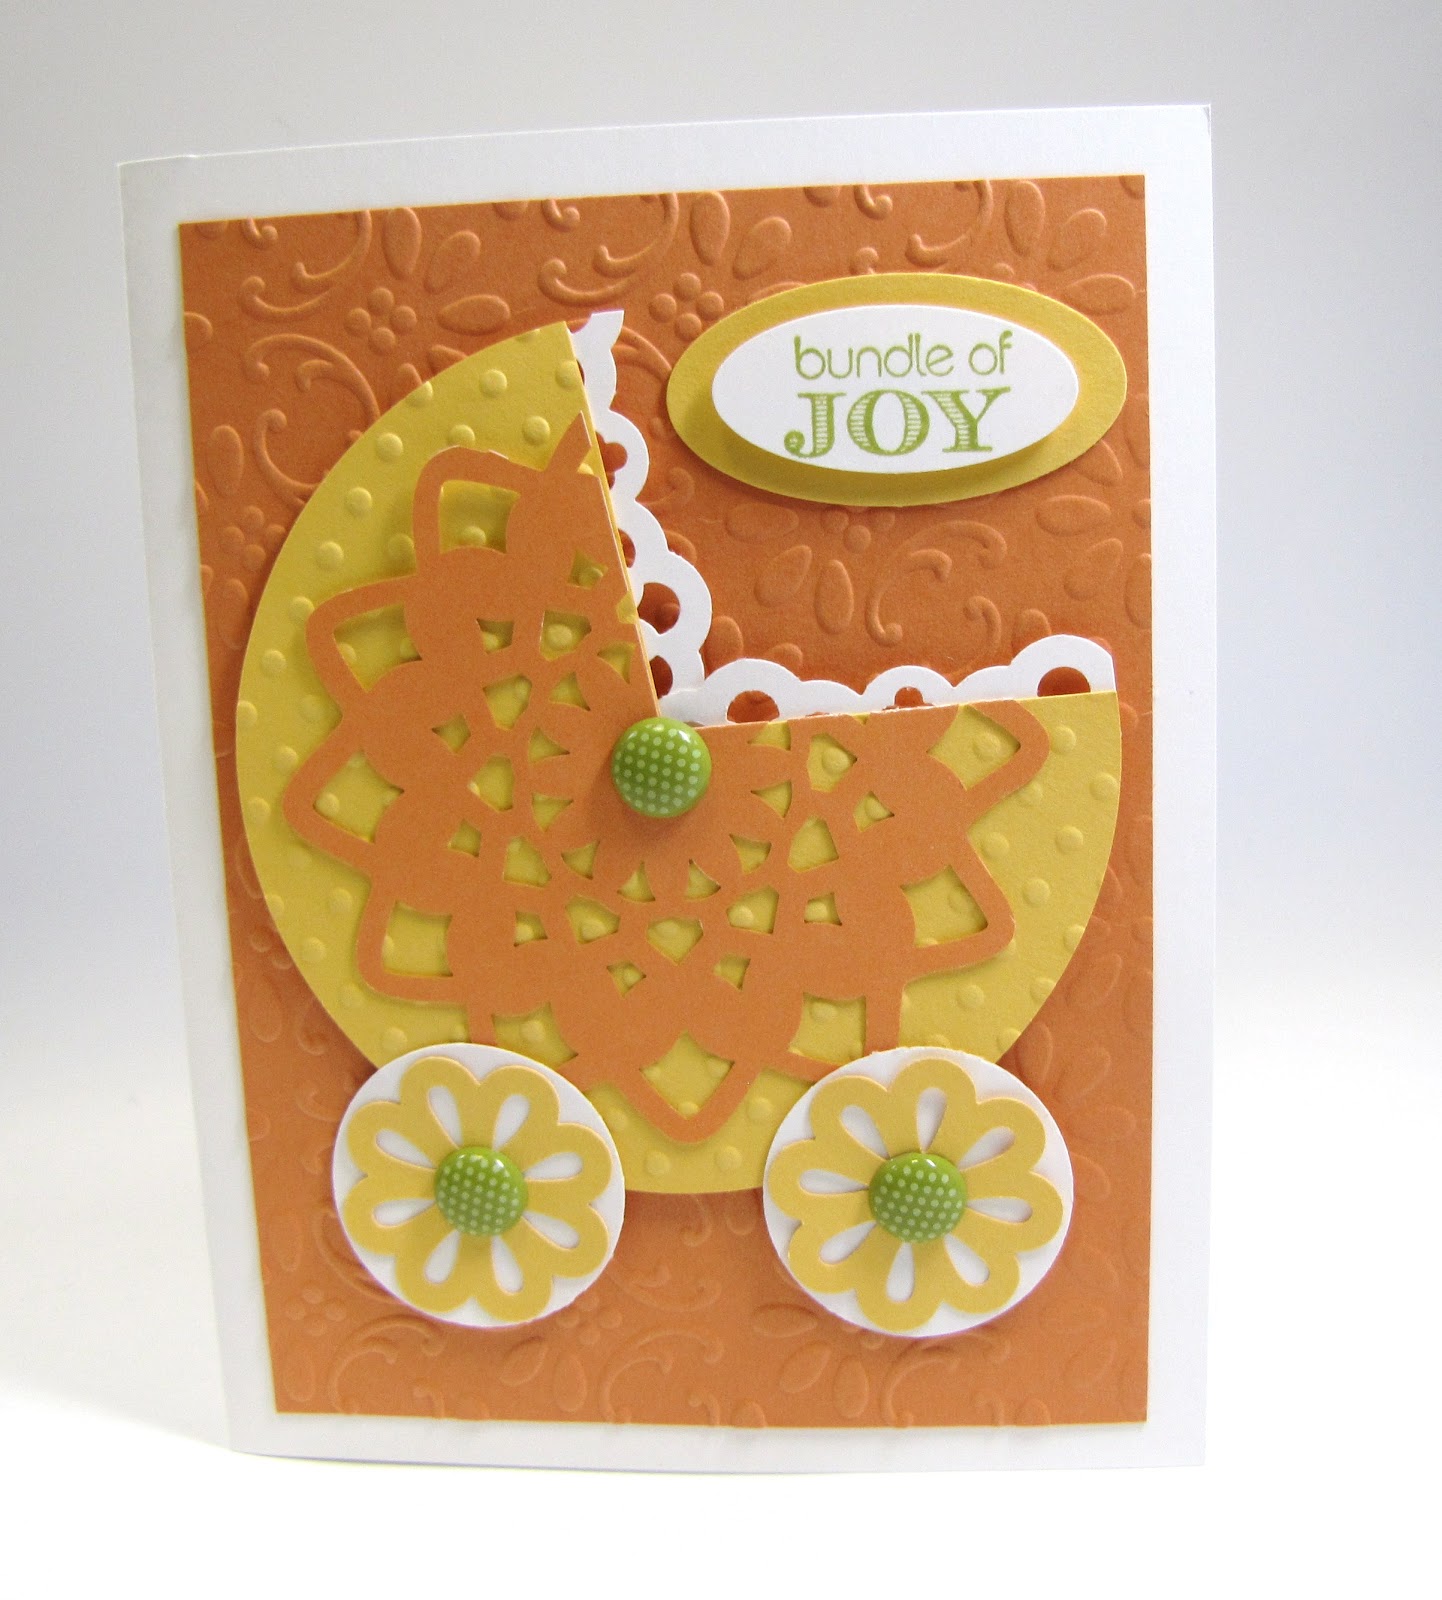
Bundle of Joy

I have another baby card for you today to go along with the challenge theme at

I cut out one of the doilies from the Flirtatious Specialty paper and put it over the top of a 3" circle that I cut using the Big Shot (I also ran it through again with the Perfect Polka Dots impressions folder).  The wheels are made from the Blossom Bouquet Triple layer punch with the 1 3/8" circle behind it.  I also used the lace ribbon border punch for a little decoration on the opening of the baby carriage. 

Supplies:
Little Angel
Peach Parfait, Daffodil Delight, Whisper White card stock
Lucky Limeade classic ink
Designer printed brads
Flirtatious Specialty Paper
Blossom Bouquet triple layer punch
lace ribbon border punch
1 3/8" circle punch
3" circle die
Perfect Polka Dots impressions folder
Finial Press impressions folder
dimensionals
glue dots
Big Shot
small and large oval punches

Wednesday, September 21, 2011

You're the Best!

I definitely went with bright colors on this card!  The patterned paper is from the Brights dsp stack and I used black embossing powder to emboss the doilie and colored it in with Daffodil Delight, Melon Mambo, Rich Razzleberry, Wisteria Wonder, Rose Red and Pear Pizazz. 


Supplies:
Delicate Doilies
Perfect words
Daffodil Delight, Pear Pizazz, Melon Mambo, Pretty in Pink, Whisper White, Rich Razzleberry card stock
Daffodil Delight, Melon Mambo, Rich Razzleberry, Wisteria Wonder, Rose Red and Pear Pizazz classic ink
Versamark
black embossing powder
heat tool
Brights DSP paper pack
modern label punch
2 1/2" circle punch
3" circle die
Big Shot
dimensionals

Tuesday, August 16, 2011

CCMC162

There is a sketch challenge at Create with Connie and Mary again this week and their sketch is below.


Here is my interpretation....


The tiny little four petal flower in the center of the two small flowers is actually part of what is punched out when you use the lace ribbon border punch.  I have been thinking about what to do with those for a little while now so I am happy to have found a used for them :)  They fit perfectly over the bitty punch with the 4 petals.

Supplies:
Love and Care stamp set
Rose Red, Not Quite Navy, Lucky Limeaide, Bashful Blue and Whisper White card stock
Rose Red, Lucky Limeaide classic ink
3" circle die
2 3/8" scallop circle punch
1 3/4" circle punch
large oval punch
lace ribbon border punch
basic rhinestones
boho blossoms punch
flower brad
dimensionals
white organza ribbon

Monday, July 18, 2011

CCMC158

The challenge at Create with Connie and Mary this week is in two parts - first a color challenge using Basic Gray, Pumpkin Pie and Saffron and second a sketch.   I kind of combined the two although the sketch is a scalloped circle card and mine is just inside a standard size card.


Supplies:
For all you Do stamp set
Pumpkin Pie, So Saffron, Basic Gray card stock and inks
dotted scallop ribbon border punch
scallop circle #2 die
3" circle die
2 1/2" circle punch
1 1/4" square punch
basic rhinestones
library clip
dimensionals

Wednesday, July 13, 2011

July Stamp Club projects

It was so fun to actually be able to meet for club again this month!  I was sooo ready :)

You will notice the card on the left has been on the blog before, I used it for a challenge on Late Night Stampers awhile back... The second one is new and I showed the ladies a fun technique with water.


We also spritzed Lucky Limeade mixed with alcohol over the pear image, but it is very subtle and doesn't show up well in the pictures.


The layouts were fairly simple ones using the Delicate Doilies stamp set and matching Flirtatious Specialty paper.


There is a little paper pleating on the page and I used some of the die cut doilies - they are so fun!

Monday, June 27, 2011

Red White and Blue


Our theme this week at Late Night Stampers is Red White and Blue.  I used some designer series paper that will come out in the new catalog at the end of the week called Just Add Cake as my background.  The daisies are stamped in Poppy Parade and the sentiment in Not Quite Navy.

I used the faux suede technique on the strip of Not Quite Navy on the right side before I scrunched it up.

Supplies:
Upsy Daisy stamp set
Whisper White, Not Quite Navy card stock
Just Add Cake DSP
bitty punches
2 1/2" circle punch
large oval punch
3" circle die
white gel pen

Saturday, June 25, 2011

Delicate Doilies Box

I decided to order the Watercolor Wonder crayons new color kit since it is on the last chance accessories list and when it arrived I found out the little tins came packaged in a cute little box...perfect to fit standard size cards into!
So, I decided to decorate it to match the Delicate Doilies cards and envelopes showed you in this post and used it as part of a door prize at our Stamp Camp today.


A view from the top...I used the 3" and 3 1/2" circle dies and cut a Whisper White and a Pumpkin Pie circle and then ran both through the Perfect Polka Dots impressions folder.  Then, I cut out one of the doilies from the specialty paper and put them together with dimensionals and an Antique Brad.


The ribbon is 5/8" Regal Rose grosgrain and I sponged the edges of the box with White craft ink.


I really like the way it turned out and am sure glad I wound up with the box :)

Saturday, June 18, 2011

Flower Fest

I was playing with the new "In Colors" when I received my preorder awhile ago and wanted to use all the new colors on one card together. 

The stamp set is Flower Fest and I also used the 2 1/2" circle punch and the 3" circle die.
New "In color" names are...
Calypso Coral, Wisteria Wonder, Lucky Limeaid, Island Indigo and Pool Party

Friday, June 17, 2011

CCMC155 and Color Inspiration 159

I decided to combine a couple challenges on this card using the Create with Connie and Mary sketch and the Stamping 411 color combination.


 I used Extreme Skateboard, Grunge Rock and Extreme Elements stamp sets and the Perfect Polka Dots impressions folder, 3" circle die and the scallop oval frame die.


Normally, I would stamp before I use and impressions folder, but this time I did it afterward.  I also used some of the Presto Patterns specialty paper and sponged it with Not Quite Navy before I folded and stapled for a different look.


Blog Archive

About Me

My photo
I am a mom, wife, farmer and Stampin' Up! demonstrator from North Dakota. I love to stamp and scrapbook and share ideas with others so I thought I would try out a blog. Hope you enjoy it!