Showing posts with label decorative label punch. Show all posts

Tuesday, March 13, 2018

Brusho Birthday


A little over a week ago I knew there was a good possibility I was going to be stranded in a hotel room for a few days due to a storm that was going to hit during the time that my son was competing in a state math competition.  Of course I decided to put together some things so that I could create a few cards if that happened!


I had played around with the Brusho crystals again and had a few pages of altered Glossy card stock ready to cut up and use so I cut all my pieces and stamped all the images and sentiments for a few different card layouts.  This is one of the cards and I will share the rest with you in the next few days.  
I left the punching, hand cutting and assembly to do in the hotel.


Supplies:
Flourishing Phrases, Special Celebrations
Memento Black ink, Berry Burst ink
Peekaboo Peach, Berry Burst, Whisper White, Glossy White card stock
Brusho crystals
Decorative label punch
Paper Pumpkin kit leftovers

Wednesday, May 10, 2017

Thank You Teacher


I can't believe it is already time to think about end of year teacher gifts again!  My kids have a countdown going of course, but I am not sure exactly how many days it is until they are done :) 

I put together some fun gift card holders for some of the teachers using the Tasty Treats specialty paper and the stamp set from the April 2017 paper pumpkin kit.


I took a 4 1/2" x 6" piece of specialty paper and scored it at 1/2" on  the 4 1/2" side and at 2 3/4" and 5 1/2" on the 6" side and then made the pouch using tear and tape adhesive.


Inside is a piece of card stock with a gift card attached and some ribbon added to the end so it can be pulled out of the pouch easily.

Supplies:
Tasty Treats specialty designer series paper
April 2017 Paper Pumpkin kit (stamp set)
Pool Party, Early Espresso ink
Whisper White, Tip Top Taupe card stock
3/8" metallic ribbon (SAB 2017)
tear and tape adhesive
decorative label punch


Thursday, May 26, 2016

Mother's Day Card


While Mother's Day has already passed I thought I would still share this card with you since you could easily add a different sentiment to the middle of it. 


I used a strip of the Sale-a-bration designer series paper called Wildflower Fields and the stamp set from the April 2016 Paper Pumpkin set. 


For accents I added some basic rhinestones and a tea lace paper doily.

Supplies:
April 2016 Paper Pumpkin
Lost Lagoon ink
Crum Cake, Basic Black, Lost Lagoon card stock
tea lace paper doilies
decorative label punch
basic rhinestones
SAB 2016 Wildflower fields dsp
circle punch


post signature

Friday, March 11, 2016

Long Altered Notepad

 
Quite awhile ago I went into an office supply store and purchased a package of note pads and then had them cut the pads into 3 pieces the long way... Well needless to say you end up with quite a few notepads and I have lots left to use up!  

 
I put this one together quickly by cutting a piece of the white card board that comes with the designer series paper packages  and adding some Neutrals color collection designer series paper to it with a glue stick. 

 
Then, I attached the note pad to that with some tear and tape adhesive and added some decorations using the All God's Grace stamp set, itty bitty punches and basic rhinestones.
 
Supplies:
All God's Grace
Basic Gray ink
Whisper White, Soft Sky and Calypso Coral card stock
decorative label punch
itty bitty accents punches
basic rhinestones
Neutrals color collection dsp
English garden dsp
 
post signature

Monday, January 4, 2016

Timeless Textures

 
Today I have a very simple card using one of the images in the Timeless Textures stamp set in the Occasions catalog (which goes live tomorrow!!).  

 
I stamped the same image  three times with Sahara Sand ink and then added some simple layers.

 
The sentiment is from a past Paper Pumpkin kit.
 
Supplies:
Paper Pumpkin, Timeless Treasures
Sahara Sand ink
Very Vanilla card stock
Corrugated paper
decorative label punch
linen thread
 
post signature

Monday, December 21, 2015

Leaves of Sympathy

 
There are so many great designer series paper options in the Occasions and Sale-a-bration catalogs!  It is hard to pick one pattern when I am ready to make a project :)  The paper in the card below is from the Going places designer series paper pack.

 
I stamped the leaves behind the sentiment using the Number of years stamp set and my sentiments are from Love and Sympathy.

 
I added a little bit of Lost Lagoon stitched satin ribbon as well.
 
Supplies:
Love and Sympathy, Number of Years
Early Espresso, Pear Pizzazz ink
Early Espresso, Tip Top Taupe, Whisper White card stock
Going Places dsp
decorative label punch
Lost Lagoon stitched satin ribbon
 
 
post signature

Monday, October 5, 2015

Wild Pumpkin Birthday

 
Well, there are no wild pumpkins in the picture like the title says but I used the Go Wild designer series paper and a previous Paper Pumpkin stamp on the card :) 
 
 
I am running into the end of my projects that I made before harvest started!  We have finished the soybeans so all crops are now completed, but there is still quite a bit of work to do before I have more time to stamp.  Hopefully soon!
 
Supplies:
Paper Pumpkin stamp set
Lost Lagoon ink
Lost Lagoon, Whisper White, Crumb Cake card stock
Go Wild dsp
Decorative label punch
Everyday Chic washi tape
 
 
post signature

Monday, July 27, 2015

Goodies!

 
When I came across this adorable little wooden crate at Target I knew what I wanted to do with it.  It is a great size for gifts of jams or jelly.  

 
I chose the Homemade for you stamp set and the Farmer's Market designer series paper to use for decorating the box. 

 
Then I added some burlap ribbon, linen thread and Venetian crochet trim ribbon as accents. 

 
Each side is decorated differently...

 
and then I also decorated the jar lids...

 
Two jars fit very well and adding some filler for cushioning is a good idea although I didn't have any on hand for the pictures.

 
Supplies:
Homemade for You
Old Olive, Blackberry Bliss ink
Soft Suede, Very Vanilla, Old Olive card stock
Farmer's Market dsp
circle punches
linen thread
Venetian crochet trim ribbon
burlap ribbon
designer buttons
 
post signature

Monday, July 6, 2015

Little Moments


After playing around with the Watercolor Wings stamp set, I think I may "need" to get the Bold Butterflies framelits too since I really don't like cutting out images! 


I layered two butterflies over the Watercolor Wash stamped image.  You can see I decided to break up that image with a few of the other ones in the Watercolor Wings set as well. 


For the sentiment I just shortened the Decorative Label punch by cutting off one side.
 
Supplies:
Watercolor Wings, Watercolor Wash
Mint Macaron, Pool Party, Tip Top Taupe, Lost Lagoon ink
Pool Party, Whisper White card stock
 
post signature

Saturday, March 21, 2015

Colorful Thanks

 
Today I have two variations of basically the same card.  It uses some scraps of Painted Blooms designer series paper and the stamp set called Simply Wonderful (SAB 2015).

 
I added a few brights candy dots on each of them as well as some washi tape.

 
Supplies:
Simply Wonderful (SAB 2015)
Smoky Slate ink
Whisper White, Basic Gray card stock
Painted blooms dsp
washi tape
decorative label punch
candy dots
Stylish stripes folder
 
post signature

Sunday, March 1, 2015

So Very Much

 
One afternoon I was on a mission to get a pile of cards created and this was one that came out of the stamping session.  I used the Kinda Eclectic and Simply Wonderful (SAB 2015) stamp sets and the Butterfly thinlit dies.

 
I had several pieces of All is Calm designer series paper left over from a stamp a stack card that I retired and used a piece of that on each one as well. 
 
Supplies:
Kinda Eclectic, Simply Wonderful
So Saffron, Smoky Slate ink
Whisper White, Smoky Slate card stock
Best Year Ever dsp (SAB 2015)
All is Calm dsp
Decorative label punch
Butterfly thinlits
post signature

Saturday, February 28, 2015

Blackberry Flower Patch

 
I used the Flower Patch stamp set to create a background image on a piece of card stock and cut it into several pieces to make a few cards.  Just like making your own designer series paper really...


Behind the custom paper, I added a piece of Blackberry Bliss card stock that was embossed with the Large Polka Dot folder and then added some Hello Honey stitched ribbon.
 
Supplies:
Flower Patch
Hello Honey, Lost Lagoon, Blackberry Bliss ink
Whisper White, Blackberry Bliss card stock
Decorative label punch
Large polka dots folder
Hello Honey stitched ribbon
stapler
post signature

Wednesday, February 25, 2015

Little Addition


The Occasions catalog has a fun layout of baby card, gift packaging and page ideas to go along with the new baby themed products.  Using one of the stamp sets on page 39, I put together this card. 


I did use the Painted Blooms designer series paper instead of the Sweet Dreams dsp that is on the same page as the stamp set.  In addition I used some Linen thread, Baker's twine and a layered Decorative label punch.
 
Supplies:
Little Sunshine
Daffodil Delight, Lost Lagoon ink
Whisper White, Early Espresso card stock
Linen Thread
Baker's Twine
mini clothespin
Painted Blooms designer series paper
post signature

Saturday, February 21, 2015

More Guy Greetings Ideas


Here are a couple more cards using the Guy Greetings stamp set and Adventure Bound designer series paper.  I think the designer series paper adds a lot to the card and haven't added a whole lot more. 


Behind the sentiment and image layer is a decorative label punched piece of Cherry Cobbler and I have also added a small paper clip from the basic hodgepodge clips assortment.

 
Supplies:
Guy greetings
Soft Suede ink
Adventure Bound dsp
Cherry Cobbler, Soft Suede card stock
Decorative label punch
basic hodgepodge clips assortment
post signature

Tuesday, January 20, 2015

Dahlias

 
I realized I had not used my Regarding Dahlias stamp set in awhile so I pulled it out one day and played with it a little bit.  The two cards below show a the same image stamped on the same color of card stock with the same ink, but one is colored with blendabilities and one is left without any coloring.

 
On the top one, I used the Coastal Cabana blendabilities to color in the flower.  It pops it out a little, but since it is stamped on Old Olive card stock, it is more subtle than if it was on a lighter color.

 
This one is left alone and I just added a layer and some extras to it.  Which do you prefer?
 
Supplies:
Regarding Dahlias
Simply Wonderful
December Paper Pumpkin stamp
Coastal Cabana blendabilities
Memento Black ink
Bermuda Bay ink
Whisper White, Very Vanilla, Old Olive, Bermuda Bay, Blackberry Bliss card stock
Decorative dots folder
Decorative label punch
Vintage buttons
Linen thread


post signature

Thursday, January 15, 2015

More Baptism Decorations


Here are a few more of the items I put together for the Baptism.  I put together a few other things too that I won't share because they have the child's whole name and some other information on them.


These jars were some I picked up awhile ago while looking for fun things to alter.  I put some mint candies in the bottom and hung a little banner and a shrink plastic cross (shrink dinks) in them.  The cross was printed with My Digital Studio and then cut out and shrunk down.

 
The tops of the jars were decorated simply with some circles, ribbon and buttons.

 
The sentiment in the one on the left comes from Blessed by God and each jar has the same thing inside.

 
Some more My Digital Studio goodies for the Hershey's kisses and these were punched out with the 1" circle punch and added with glue dots.
 
post signature

Monday, November 24, 2014

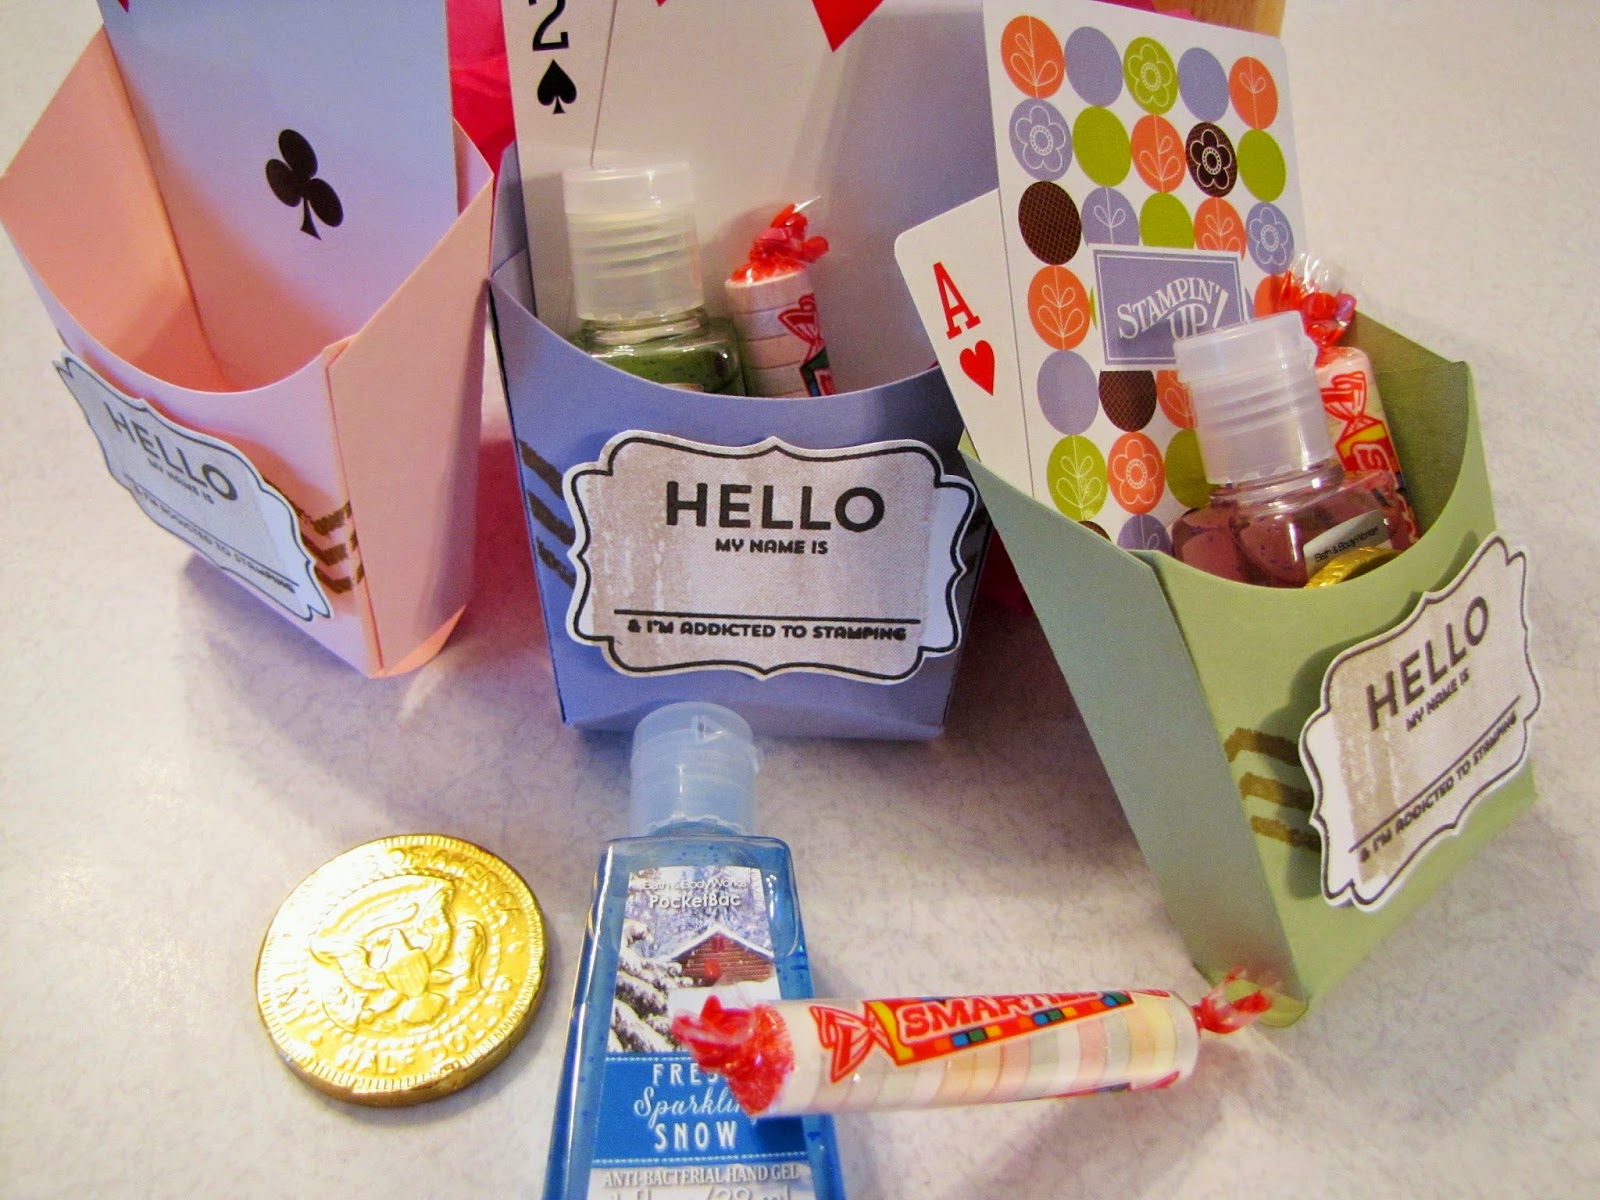
Addicted to Stamping

 
Last weekend was the semi annual scrapbooking retreat that I go to at our local and awesome Bible Camp.  I always like to make a little something to put on everyone's table and this year tried to tie in with the theme of "What Happens at the Retreat, Stays at the Retreat!" 

 
These French Fry boxes went together much more quickly than I had anticipated which I was grateful for since we had 50 people attending!  I stamped an image from Work of Art on the front of them before putting them together and then added the "Hello my name is..." afterward.  The fast fuse adhesive worked great to keep them together.

 
This is what I put inside them along with a couple Stampin' Up! playing cards for fun.

 
Supplies:
Work of Art
Assorted card stock
Early Espresso, Baked Brown Sugar ink
French Fry die
Fast Fuse adhesive
post signature

Blog Archive

About Me

My photo
I am a mom, wife, farmer and Stampin' Up! demonstrator from North Dakota. I love to stamp and scrapbook and share ideas with others so I thought I would try out a blog. Hope you enjoy it!