Showing posts with label circles framelits. Show all posts

Sunday, February 14, 2021

Happy Valentine's Day!

I thought I would share a few Valentine's projects I put together using some retired items, last month's Paper Pumpkin kit and some designer series paper from Sale-a-bration.


Valentine's Day is also my anniversary - 23 years!! The tag below is for my husband's gift and is made with the retired circles framelits, retired Parisian Blooms specialty paper, a stamp and embellishments from the January Paper Pumpkin kit, Love You 
Always Specialty paper and 
the Love You More than Dies.


The card is made with similar items, adding the Well Said stamp set and Flower and Field designer series paper (SAB 2021).


This red tin came in handy for some Hershey's kisses and gift cards for my nieces using the same products in the other projects.


I used some ribbon from the Paper Pumpkin kit along with some ribbon from the Holiday catalog to wrap around it.


Happy Valentine's Day!

Thursday, April 19, 2018

First Communion


My niece recently had her first communion and I wanted to use the Cross of hope framelits and Inspired events stamp set on her card.  I made another version of the card to give to the boys who also received their first communion and will share that another day.  


First, I colored the background with Stampin' Blends and then added my layers over the top.  The Crumb Cake colored cross was die cut from the middle of the large Crumb Cake circle behind it.  Before I did the die cutting, I embossed the circle with the Basket Weave folder (SAB 2018).  


Supplies:
Inspired Events
Pear Pizzazz, Perfect Plum, Early Espresso, Crumb Cake ink
Stampin' Blends
Crumb Cake, Very Vanilla, Wild Wasabi card stock
Circles framelits
Cross of Hope framelits
Springtime foils specialty paper (SAB 2018)
Basket weave folder (SAB 2018)

Thursday, September 21, 2017

Circled Birthday


When I die cut things I usually make extras for use in later projects and that is what I did with the Happy Birthday die cut awhile ago when I cut out some in Crumb Cake card stock.  The card I shared with you before needed more contrast in color between the die cut and the background so I tried a brighter background on this one.

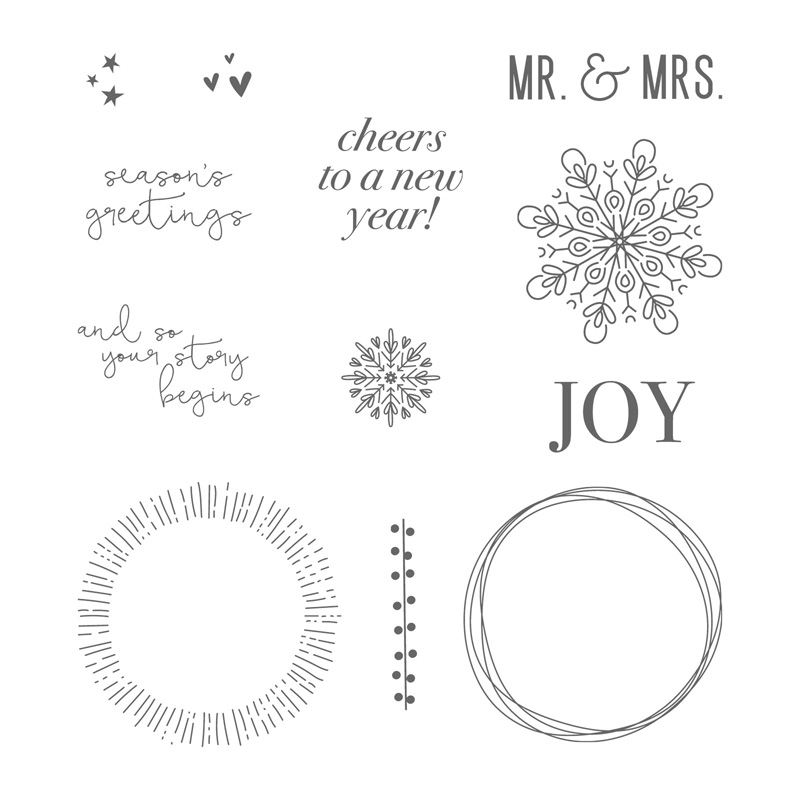
The circle behind the die cut is made with the Circles framelits and Melon Mambo card stock.  I embossed it with the Perfect Polka Dots folder and then used glue dots to add the Happy Birthday.  To create the background, I took a piece of Fresh Fig card stock and stamped some images from the Cheers to the Years stamp set with Fresh Fig and Berry Burst ink.  You may notice that there are not full circle images in that stamp set, I kept the insides of the scribbled circle and circle with little lines to use for stamping when I put it together.
Cheers to the Year Wood-Mount Stamp Set


Supplies:
Cheers to the Years
Berry Burst, Fresh Fig ink
Melon Mambo, Crumb Cake, Fresh Fig card stock
Bermuda Bay mini chevron ribbon
Circles framelits
Happy Birthday thinlit
Perfect Polka dots folder


Tuesday, June 6, 2017

A Beautiful Thing


I again pulled out some leftover pieces that I didn't use on the graduation banner I shared a little while ago to make a couple cards using the Colorful Seasons stamp set.  I really love all the sentiments in this stamp set as well as the variety of image stamps.


The layered circles are cut out with the Stitched Shapes framelits and the Circles framelits.  The bottom layer is also embossed with the Decorative Dots folder.  I chose a pattern from the Delightful Daisies designer series paper pack to go behind the layers and added a couple different types of ribbon to break up the pattern. 


Supplies:
Colorful Seasons
Basic Gray ink
Very Vanilla, Basic Gray, Smoky Slate card stock
Delightful Daisies dsp
3/8" metallic ribbon (SAB 2017)
Vanilla satin ribbon
enamel dots
Stitched Shapes Framelits
Circles Framelits
Decorative Dots folder


Thursday, May 25, 2017

Here for You


I had some extra pieces leftover from the graduation banners I shared with you earlier this week and thought I would make some cards with them using the Urban Underground specialty paper.


I chose a couple different patterns of the designer series paper and used a sentiment from Sending Thoughts.  The top circle is popped up with dimensionals and I added some Urban Underground embellishments to finish it off.


Supplies:
Sending Thoughts
Basic Black ink
Very Vanilla, Basic Black, Basic Gray card stock
circles framelits
stitched shapes framelits
decorative dots folder
Urban underground specialty paper
Urban underground embellishments


Thursday, August 25, 2016

First Day!


Summer vacation is officially over for my kids, today is the first day of school.  Last year I found these arrows at a craft store and altered them with designer series paper and letters/numbers.  You can see that post here...This year, I took the same arrows and altered the other side.


When I put them together last year I added the "grade" and number layers with Velcro so I could remove them and change things and I may do that another year, but I just decided to use different paper and colors this year.  A couple of the "grade" pieces are the same as last year that I just took off the other side.


For Hunter, I used the Halloween night specialty paper in the background (a sneak peek item from the Holiday catalog) because I liked the brick design.  The number on this and the other arrows is die cut using the Large Numbers framelits.


For Wyatt, I chose the apples from the Fruit stand collection of designer series paper and his letters are cut from the Large Letters framelits, this is the one that is different from last year because on the other side of this arrow I had used Very Vanilla instead of Whisper White card stock.


There is a little bit of burlap ribbon where I had a seam of designer series paper since the arrows are longer than 12 inches.


Lastly, Maddie's is done with Blooms and Bliss designer series paper and some ruched ribbon. 


I will probably share some photos with the kids holding these another day but thought I would share the concept now.


Supplies:
Blooms and Bliss, Halloween Nigh specialty, Fruit Stand designer series paper
Large Numbers and Large Letters framelits
Circles framelits
2 1/2" circle punch
Typeset Alphabet Bigz dies
Mod Podge
Whisper White, Mint Macaron, Basic Black, Emerald Envy, Tip Top Taupe, Pool Party card stock
5/8" Sweet Sugarplum ruched ribbon
burlap ribbon
Wooden arrows

PP_BOGO_FB-Thumbnail


post signature

Sunday, April 17, 2016

75

 
Today we celebrate my dad's 75th birthday.  ( I have no doubt he has never seen my blog so I am not too worried about him seeing pictures of his card before he receives it!)  I decided to make his card in colors of his favorite things - John Deere tractors and of course NDSU Bison.  In Stampin' Up! terms, those colors are Daffodil Delight and Garden Green :)

 
The saying that is in the Number of Years stamp set is perfect for his card too so I used that on the front.  On the inside I added the happy birthday with some of the watercolor images as well but I didn't take a picture of it...

 
The enamel dots are leftovers from a couple different Paper Pumpkin kits.
 
Supplies:
Number of Years
Basic Black ink
Daffodil Delight, Garden Green, Basic Black and Whisper White card stock
Arrows folder
circles framelits
enamel dots
 

post signature

Friday, February 19, 2016

February Stamp Club projects

 
Today I am sharing this month's stamp club projects.  The first is a card using the Suite Sayings stamp set with Wildflower Fields designer series paper (SAB 2016), Circles framelits and the tags and labels framelits collection.

 
For our second card, I chose the Perfect Pairings stamp set (SAB 2016) and the Have a Cuppa designer series paper set.

 
Finally, for the layout this month I did something a little different.  I used the Memories in the Making Project Life collection, including the pack found in the Sale-a-bration flyer and made them a 12 x 12 pocket page. 

 
If you enjoyed these projects and would like to try out either my monthly stamp club or my virtual one, contact me here for more information.
 
 
post signature

Sunday, December 6, 2015

Warm Wishes

 
This is the second card I used in a swap recently and it uses the Winter Wonderland designer vellum.  I first embossed my Soft Suede card stock with the Brick Wall folder and then cut a circle out of it with the Circles framelits.  

 
Then, I added the vellum behind it and my stamping and embellishments.

 
As I was putting these cards together, the photographer for the local newspaper was walking around taking pictures of the retreat and had me tie some ribbon in a posed shot (I think it looks a little silly, LOL!)...
 
Supplies:
Warm Wishes
Crumb Cake, Basic Black ink
Soft Suede, Very Vanilla card stock
Winter Wonderland designer vellum
Brick wall folder
Circles framelits
1" Delightful Dijon dotted lace trim
gold baker's twine
Venetian crochet trim
basic pearls
 
post signature

Monday, July 20, 2015

Decorative Jar

 
This little jar called to me one day when I was walking through a craft store :)  I decided to decorate it using the Butterfly Basics, Summer Silhouettes and Gorgeous Grunge stamp sets and some white Corrugated paper.  

 
The jar had rectangular framelike spots on each of four sides that I added panels to and behind those is a layer of white jute ribbon.

 
Each panel is decorated differently but has a piece of white corrugated paper behind it.


There are two panels that are Lost Lagoon in color and two that are Tip Top Taupe...

 
I used the butterfly punches a few time as accents and some of the thick baker's twine from Sale-a-bration...

 
This one has some 1" dotted lace trim that was cut down to narrower pieces...

 
I put some ribbon inside for picture taking purposes, but would probably fill it with candy or cookies or button or something fun for a door prize or gift...

 
On the top I cut out more white corrugated paper and a Tip Top Taupe piece that were cut from the circles framelits and added some stamps and accents. 

 
Underneath the top circle, I wrapped some 1" dotted lace ribbon and thick baker's twine around the corrugated paper and tied it with some linen thread...
 
Supplies:
Butterfly Basics, Gorgeous Grunge, Summer Silhouettes
Lost Lagoon, Tip Top Taupe card stock
White corrugated paper
Tip Top Taupe, Lost Lagoon ink
linen thread
butterfly punches
white jute ribbon
1" dotted lace trim
baker's twine
designer buttons
circles framelits
 
post signature

Monday, June 1, 2015

Bridal Shower Decorations

Now that the bridal shower I was asked to make decorations for is over, I can share some pictures with you. Ok well, a lot of pictures actually!  

 
I started with some mason jars that I painted with gray and yellow acrylic paint.  Next I added some White Jute ribbon around them and placed a Tea Lace Paper doily under a tissue paper flower.

 
The flowers are all layers of tissue paper that have been cut out with the Big Shot and the Circles framelits.  I did not have access to the Cotton paper that is in the new catalog at the time I made these or I would have tried that instead of the tissue paper.  I imagine the end result would have been pretty close to the same thing.

 
There are little tags hooked onto the kabob sticks that hold the flowers and each are stamped with a sentiment from the For the New Two stamp set.  The tags were created using the Scalloped Tag Topper Punch.

 
A side view of the painted jar...

 
I thought there should be something placed under the jars so I created a mat using different shades of yellow and gray and different embossing folders.  The pieces are attached to a piece of Whisper White card stock.

 
A table frame for the engagement photo had the same type of background as I used on the mats.

 
I had lots and lots of extra flowers so that they could be placed on the tables around the centerpieces to add more decoration and color.

 
For the banner, I used the Chalkboard Banner Simply Created Kit and cut the letters using a retired die called Serif Alphabet.

 
Each end had a tissue paper flower attached.

 
The chalkboard banner pieces were stamped with flower images from Mother's Love using white craft ink and yellow chalk ink. I added a few large rhinestones to some of the flowers as well.

 
It was a fun project to put together and since I did not attend the shower, I just set things up for pictures at home and it doesn't give the same effect as if it was set up for the shower. 
 
 
post signature

Blog Archive

About Me

My photo
I am a mom, wife, farmer and Stampin' Up! demonstrator from North Dakota. I love to stamp and scrapbook and share ideas with others so I thought I would try out a blog. Hope you enjoy it!